Introduction
There’s something timeless about a chocolate pound cake recipe that makes it a favorite for all occasions. Its rich, buttery texture combined with the deep, satisfying taste of chocolate creates a dessert that’s as comforting as it is indulgent. Perfect for family gatherings, birthdays, or a treat-yourself moment, a chocolate pound cake is a versatile dessert that fits any occasion.
This recipe will guide you step-by-step to create the ultimate chocolate pound cake that’s moist, flavorful, and utterly delightful. Whether you’re a seasoned baker or trying your hand at baking for the first time, this guide is designed to ensure your success. Along the way, we’ll also share tips, tricks, and variations to make this cake your own.
Let’s dive into the world of chocolate decadence and unlock the secrets to making the perfect chocolate pound cake.
Ingredients
To create a perfect chocolate pound cake, the quality and balance of ingredients are paramount. Below is a detailed list of what you’ll need to get started, along with optional additions to customize the recipe.
Essential Ingredients
- Butter (1 cup or 226g, unsalted, softened)
- Adds richness and creates the dense, buttery texture characteristic of pound cake.
- Granulated Sugar (2 cups or 400g)
- Provides sweetness and helps cream the butter for a light, airy batter.
- Eggs (5 large)
- Acts as a binding agent and adds moisture.
- All-Purpose Flour (2 cups or 240g)
- The structure of the cake relies on a precise amount of flour for balance.
- Cocoa Powder (¾ cup or 90g, unsweetened)
- Delivers the intense chocolate flavor. Sift to remove lumps for a smoother batter.
- Baking Powder (1 teaspoon)
- Provides a slight lift to avoid an overly dense cake.
- Salt (½ teaspoon)
- Enhances the overall flavor and balances the sweetness.
- Milk (½ cup or 120ml, whole milk preferred)
- Adds moisture and helps achieve a silky batter consistency.
- Vanilla Extract (2 teaspoons)
- Complements the chocolate flavor with subtle warmth and aroma.
Optional Additions
- Chocolate Chips (½ cup or 90g)
- For bursts of melted chocolate in every bite, fold these into the batter.
- Nuts (½ cup, chopped, such as walnuts or pecans)
- Add texture and a nutty contrast to the rich chocolate.
- Flavored Extracts
- Try almond or peppermint extract (1 teaspoon) for a unique twist.
- Espresso Powder (1 teaspoon)
- Intensifies the chocolate flavor without adding a coffee taste.
- Orange Zest (1 tablespoon)
- Adds a citrusy brightness for a more complex flavor profile.
Ingredient Selection Tips For Chocolate Pound Cake Recipe
- Butter: Always use unsalted butter to control the amount of salt in the recipe. Let it sit at room temperature for at least 30 minutes before using.
- Cocoa Powder: Opt for Dutch-processed cocoa if you prefer a milder, smoother chocolate taste.
- Milk: Whole milk works best, but you can substitute with heavy cream or plant-based alternatives like almond milk.
Preparing the Batter

The batter is the foundation of your chocolate pound cake, and the secret lies in the technique. Follow these steps carefully for a smooth, lump-free, and perfectly balanced mixture.
Step-by-Step Guide For Chocolate Pound Cake Recipe
- Prepare Your Workspace
- Gather all ingredients and tools. Ensure your butter is softened and eggs are at room temperature. Preheat your oven to 325°F (163°C) and grease a 9×5-inch loaf pan with butter or non-stick spray. Dust lightly with cocoa powder or flour to prevent sticking.
- Cream the Butter and Sugar
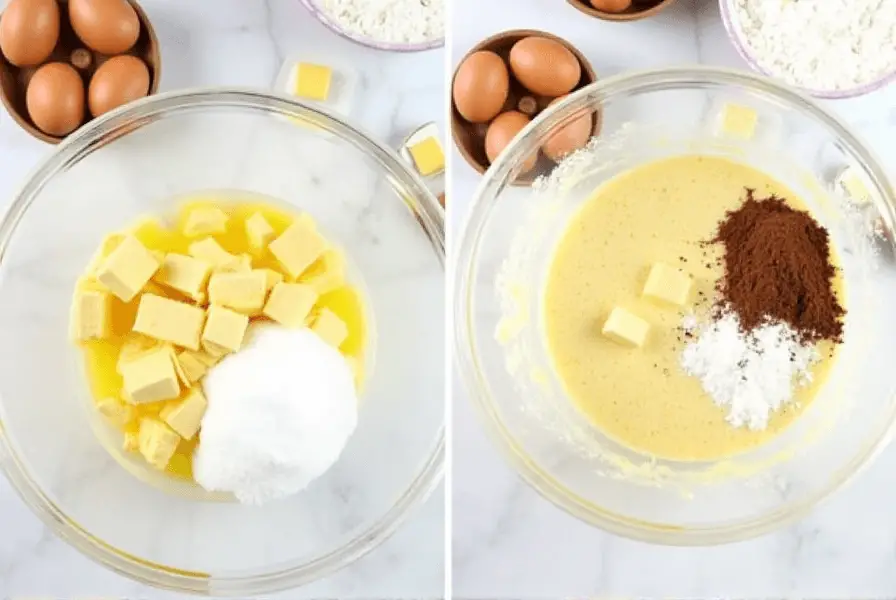
- In a large mixing bowl, beat the softened butter and granulated sugar together using an electric mixer on medium speed. Continue mixing for about 3-5 minutes until the mixture is light, fluffy, and pale in color. This step incorporates air, which helps create a tender crumb.
- Incorporate the Eggs
- Add the eggs, one at a time, beating well after each addition. Scrape down the sides of the bowl with a spatula to ensure everything is evenly mixed. The batter should be smooth and slightly thick at this stage.
- Sift and Combine the Dry Ingredients
- In a separate bowl, sift together the all-purpose flour, cocoa powder, baking powder, and salt. Sifting removes any lumps and evenly distributes the leavening agent for consistent results.
- Alternate Adding Dry Ingredients and Milk
- With the mixer on low speed, gradually add the dry ingredients in three additions, alternating with the milk. Begin and end with the dry mixture. This technique ensures the batter remains smooth and prevents overmixing, which can make the cake dense.
- Add Vanilla Extract (and Optional Ingredients)
- Stir in the vanilla extract. If you’re using optional additions like chocolate chips, nuts, or orange zest, fold them into the batter gently with a spatula.
- Final Check
- The batter should have a thick but pourable consistency. If it feels too thick, add an extra tablespoon of milk. Avoid overmixing, as this can result in a tough texture.
Common Mistakes to Avoid
- Skipping Room Temperature Ingredients
- Using cold butter or eggs can lead to a curdled batter, resulting in uneven texture.
- Overmixing
- Once you add the flour, mix only until combined to avoid activating the gluten, which can make the cake dense and chewy.
- Ignoring Lumps in Dry Ingredients
- Unsifted cocoa powder often clumps and doesn’t blend well into the batter, leading to uneven pockets of flavor.
Troubleshooting Batter Issues
- Too Thick: Add a splash of milk to loosen it up.
- Curdled Appearance: This is often caused by cold ingredients. Continue mixing; the addition of flour should help it come together.
Baking Instructions
The baking process is crucial to achieving the perfect chocolate pound cake. Follow these steps to ensure your cake is evenly baked, moist, and packed with flavor.
Preheating the Oven
- Set the Temperature
- Preheat your oven to 325°F (163°C). A slightly lower temperature helps the cake bake evenly without becoming dry.
- Position the Rack
- Place the oven rack in the center position. This ensures uniform heat distribution around the cake.
- Prepare the Pan
- Ensure your 9×5-inch loaf pan is well-greased and lightly dusted with cocoa powder or flour. If using parchment paper, line the bottom and sides, leaving overhangs for easy removal after baking.
Pouring the Batter
- Transfer the Batter
- Pour the prepared batter into the greased pan. Use a spatula to smooth the top, ensuring it’s evenly distributed.
- Eliminate Air Bubbles
- Tap the pan gently on the countertop 2-3 times to release any trapped air bubbles.
Baking the Cake
- Set the Timer
- Place the pan in the preheated oven and bake for 60–70 minutes. Start checking for doneness at the 60-minute mark.
- Monitor Progress
- Halfway through baking, rotate the pan 180 degrees to promote even cooking, especially if your oven has hot spots.
- Check for Doneness
- Insert a toothpick or skewer into the center of the cake. If it comes out clean or with only a few moist crumbs, the cake is done. If batter sticks to the toothpick, bake for an additional 5 minutes and check again.
Signs of a Perfectly Baked Cake
- The edges pull away slightly from the sides of the pan.
- The top is firm and develops a slight crack, a signature look of pound cakes.
- The kitchen is filled with the irresistible aroma of chocolate.
Post-Baking Steps
- Cool in the Pan
- Remove the pan from the oven and let the cake cool for 10–15 minutes in the pan. This allows the structure to set and makes it easier to release from the pan.
- Transfer to a Wire Rack
- Carefully run a knife along the edges of the pan if necessary, then invert the cake onto a wire rack. Peel off the parchment paper (if used) and let it cool completely.
- Patience is Key
- Avoid slicing the cake while it’s warm, as it may crumble. Allow it to cool fully to lock in the moisture and flavor.
Pro Tips for Baking Success
- Avoid Overbaking
- Check for doneness regularly after the 60-minute mark to prevent a dry cake.
- Pan Alternatives
- If you don’t have a loaf pan, use a bundt pan or a round cake tin, but adjust the baking time accordingly.
- Oven Thermometer
- Use an oven thermometer for accurate temperature readings, as oven dials can be misleading.
Cooling and Presentation

A properly cooled and beautifully presented chocolate pound cake not only tastes better but also adds a touch of elegance to your baking efforts. Let’s explore how to handle the cake post-baking and elevate its presentation.
Proper Cooling Techniques
- Initial Cooling in the Pan
- After removing the cake from the oven, let it cool in the pan for 10–15 minutes. This resting period helps the cake firm up, making it easier to handle without breaking.
- Transferring to a Wire Rack
- Carefully run a knife or thin spatula around the edges of the pan to loosen the cake. Gently invert it onto a wire rack. If you’ve used parchment paper, peel it away from the cake’s bottom.
- Allow Full Cooling
- Let the cake cool completely on the wire rack, ideally for 1–2 hours. Cooling ensures the cake’s moisture redistributes evenly, enhancing its flavor and texture.
- Avoid Moisture Build-Up
- Place the wire rack in a well-ventilated area to prevent condensation from forming under the cake, which can make it soggy.
Serving Suggestions

- Slicing Tips
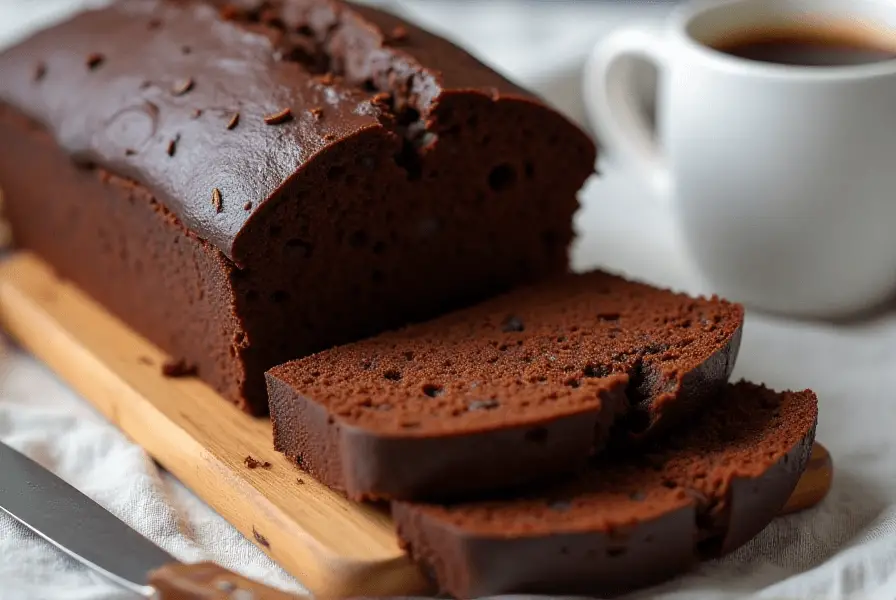
- Use a serrated knife for clean, even slices. Wipe the blade with a damp cloth after each cut to maintain a neat presentation.
- Accompaniments
- Serve slices with:
- A dollop of whipped cream or a scoop of vanilla ice cream.
- Fresh berries like strawberries or raspberries for a pop of color and flavor.
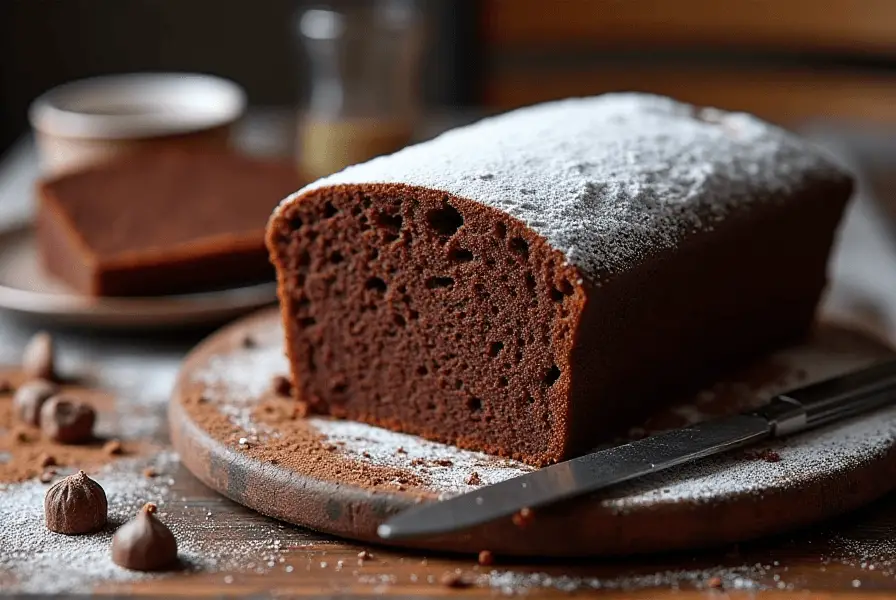
- A drizzle of chocolate ganache, caramel sauce, or a dusting of powdered sugar for added elegance.
- Serve slices with:
- Garnishing Ideas
- Sprinkle the top with:
- Shaved chocolate curls for a gourmet touch.
- A light dusting of cocoa powder for a rustic look.
- Chopped nuts or edible flowers for added texture and appeal.
- Sprinkle the top with:
Creative Presentation Options
- Layered Elegance
- Slice the cake horizontally and spread a layer of chocolate mousse or whipped cream between the layers for a decadent dessert.
- Cake Platter Display
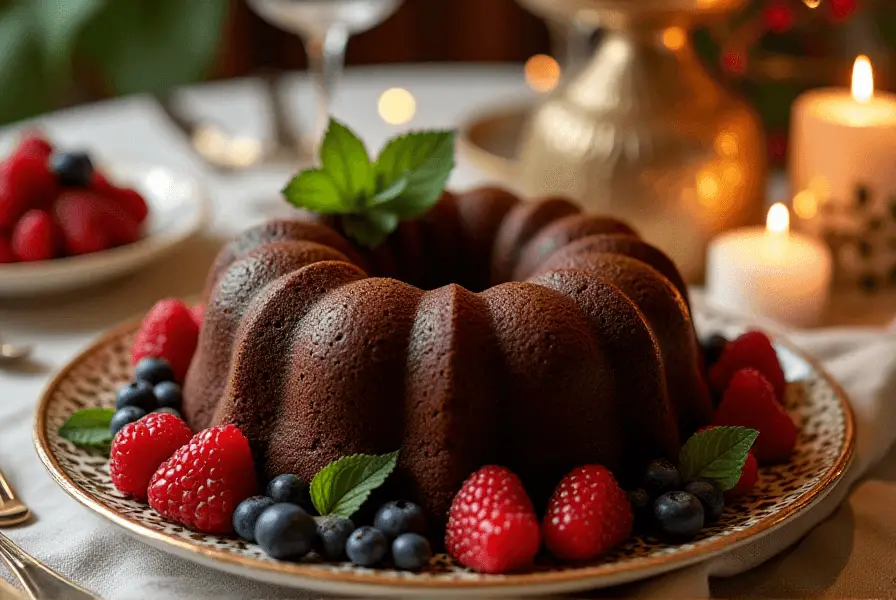
- Place the cake on a decorative cake stand or platter, surrounded by garnishes like mint leaves or fruit slices to create a visual feast.
- Mini Portions
- Cut the cake into small, bite-sized squares or bars and serve them as part of a dessert platter.
Pro Tips for Presentation Success
- Uniform Slices: Use a ruler to mark equal slices before cutting for a professional appearance.
- Temperature Considerations: Serve the cake at room temperature for the best texture and flavor.
- Lighting for Photos: If photographing your masterpiece, natural lighting brings out the rich tones of the chocolate.
Tips for Perfect Results and Recipe Variations
Mastering a chocolate pound cake recipe doesn’t stop at the basics. With a few expert tips and creative variations, you can make your cake stand out and suit any occasion or preference.
Tips for Perfect Results
- Room Temperature Ingredients Are Key
- Ensure butter, eggs, and milk are at room temperature before starting. This helps them blend seamlessly, resulting in a smoother batter and better texture.
- Accurate Measurements
- Use a kitchen scale for precise measurements, especially for flour and cocoa powder. Baking is a science, and small variations can impact the outcome.
- Don’t Overmix
- Once you add the dry ingredients, mix just until combined. Overmixing develops gluten, which can lead to a dense cake.
- Check Oven Temperature
- Calibrate your oven or use an oven thermometer to ensure it’s heating to the correct temperature. Baking at the wrong temperature can result in undercooked or dry cake.
- Use Quality Ingredients
- The flavor of your cake depends on the quality of your cocoa powder, vanilla extract, and butter. Investing in high-quality ingredients makes a noticeable difference.
- Rotate the Pan
- Turn the pan halfway through baking to ensure even cooking, especially if your oven has uneven heat spots.
- Don’t Skip Sifting
- Sift dry ingredients like cocoa powder and flour to remove lumps and achieve a consistent texture.
Adjustments for High Altitude or Dietary Needs
- High Altitude Baking
- Reduce sugar by 1–2 tablespoons and increase liquid (milk) by 2 tablespoons to compensate for faster evaporation at higher altitudes. Bake at a slightly lower temperature for a few minutes longer.
- Dietary Modifications
- Substitute all-purpose flour with a gluten-free flour blend for a gluten-free option.
- Replace butter with plant-based margarine and milk with almond or oat milk for a dairy-free version.
Flavorful Variations
- Marble Pound Cake
- Reserve one-third of the batter and mix in an additional tablespoon of cocoa powder. Layer and swirl this chocolate-heavy batter with the regular batter for a marbled effect.
- Mint Chocolate Pound Cake
- Add 1 teaspoon of peppermint extract and fold in mint chocolate chips for a refreshing twist.
- Spiced Chocolate Pound Cake
- Enhance the batter with a teaspoon of cinnamon, a pinch of nutmeg, and a dash of cayenne pepper for a warm, spicy flavor profile.
- Orange Chocolate Pound Cake
- Incorporate the zest of one orange into the batter and drizzle the finished cake with orange glaze for a citrusy complement.
- Nutty Delight Pound Cake
- Fold in chopped hazelnuts, almonds, or pecans for added crunch and a nutty depth of flavor.
- Chocolate Lava Pound Cake
- Create a molten center by adding a layer of ganache or thick chocolate syrup into the middle of the batter before baking.
Chocolate Substitutes and Enhancements
- Cocoa Powder Alternatives
- If you don’t have cocoa powder, substitute it with unsweetened melted chocolate (2 ounces of melted chocolate for every 3 tablespoons of cocoa powder, reducing liquid by 1 tablespoon).
- Enhanced Flavors with Espresso
- A teaspoon of espresso powder in the batter intensifies the chocolate flavor without making the cake taste like coffee.
- White Chocolate Version
- Replace cocoa powder with melted white chocolate for a creamy, sweet variation.
Experimentation Encouraged!
Don’t hesitate to try combinations of the above ideas—like a spiced chocolate lava cake or a marble pound cake with orange zest. Baking is an adventure, and the possibilities are endless.
FAQ
Here are some frequently asked questions about making the perfect chocolate pound cake, along with detailed answers to help you troubleshoot and enhance your baking experience.
FAQ 1: Why is my chocolate pound cake recipe dry?
A dry pound cake often results from one or more of the following:
- Overbaking: Check the cake for doneness at the earliest suggested time and bake only until a toothpick comes out with a few moist crumbs.
- Too much flour: Use a kitchen scale for accurate measurement or spoon the flour into your measuring cup before leveling it off.
- Insufficient liquid: Ensure you add the full amount of milk specified in the recipe.
FAQ 2: How do I fix a curdled batter?
A curdled batter typically happens when cold ingredients (like butter, eggs, or milk) are used, or the eggs are added too quickly.
- To fix this, continue mixing gently, and add a spoonful of flour to help bind the ingredients.
FAQ 3: Can I make this recipe ahead of time?
Absolutely! Chocolate pound cake recipe tastes even better the next day as the flavors have time to meld.
- Storage: Wrap the cooled cake tightly in plastic wrap and store it at room temperature for up to 3 days. For longer storage, freeze the cake for up to 3 months. Thaw overnight in the fridge before serving.
FAQ 4: What’s the best way to reheat pound cake?
To reheat and enjoy the cake warm:
- Microwave: Heat a slice for 10–15 seconds.
- Oven: Wrap in foil and heat at 300°F (150°C) for 10 minutes.
FAQ 5: Can I use this recipe for cupcakes?
Yes, the batter works well for cupcakes!
- Adjustments: Fill cupcake liners ¾ full and bake at 325°F (163°C) for about 20–25 minutes. Check for doneness with a toothpick.
FAQ 6: How can I make this recipe Chocolate Pound Cake Recipe healthier?
To create a lighter version of the cake:
- Substitute half the butter with unsweetened applesauce.
- Use Greek yogurt instead of some of the milk for added protein.
- Replace some of the sugar with a natural sweetener like stevia or honey, keeping in mind this may slightly alter the texture.
FAQ 7: What’s the best way to frost or glaze this cake Chocolate Pound Cake Recipe?
While this cake is delicious on its own, a simple glaze or frosting can elevate it further:
- Chocolate Ganache: Pour over the cooled cake for a shiny, luxurious topping.
- Cream Cheese Frosting: Spread on top for a tangy contrast to the rich chocolate.
- Powdered Sugar Glaze: Whisk powdered sugar with a splash of milk and vanilla extract, then drizzle over the cake for a light, sweet finish.
FAQ 8: How can I prevent my cake from sticking to the pan?
To avoid sticking:
- Grease the pan thoroughly with butter or non-stick spray, ensuring all corners are coated.
- Dust with cocoa powder (for chocolate cakes) or flour.
- Alternatively, line the pan with parchment paper for easy removal.
FAQ 9: Can I double this recipe for a larger crowd?
Yes, you can double the ingredients, but make sure you use a larger pan or divide the batter into two pans. Adjust baking time accordingly and monitor closely.
FAQ 10: What type of cocoa powder should I use?
For the richest flavor:
- Dutch-Processed Cocoa Powder: Provides a smoother, milder chocolate flavor.
- Natural Cocoa Powder: Offers a more robust and slightly tangy flavor.
FAQ 11: Why did my cake crack on top?
Cracking on top is common in pound cakes and happens as the batter rises and the crust sets. It’s a sign of a well-baked cake and adds to its rustic charm.
FAQ 12: Can I add fruit to the batter?
Yes! Fold in chopped dried fruits like cherries or apricots for added flavor and texture.
Conclusion
A perfectly baked chocolate pound cake recipe is more than just a dessert—it’s a symbol of comfort, indulgence, and the joy of sharing homemade treats with loved ones. From its rich, buttery texture to its deep chocolate flavor, this timeless cake has a way of turning any occasion into a celebration.
By following this comprehensive recipe, complete with expert tips, variations, and answers to common questions, you can confidently create a masterpiece that’s sure to impress. Whether you serve it plain, adorned with garnishes, or paired with your favorite accompaniments, this chocolate pound cake recipe is bound to become a staple in your baking repertoire.
So, preheat your oven, gather your ingredients, and let the magic of chocolate fill your kitchen. Happy baking, and may your chocolate pound cake be as delightful to eat as it is rewarding to make!
A perfectly baked chocolate pound cake is a versatile dessert that can elevate any occasion. Whether you’re hosting a party or enjoying a quiet evening, this indulgent cake is sure to delight everyone at the table.
If you’re eager to try more amazing recipes, don’t miss these favorites:

