Introduction
Nestle Toll House Milk Chocolate Chip Cookies Recipe are a beloved classic that has stood the test of time. Whether it’s the irresistible aroma wafting from the oven or the delightful balance of chewy centers and crisp edges, these cookies have won hearts around the world. This iconic recipe traces its roots to Ruth Wakefield, who accidentally invented the chocolate chip cookie at the Toll House Inn in the 1930s. Little did she know her creation would spark a culinary revolution.
In this article, we’ll explore every detail of the Nestle Toll House Milk Chocolate Chip Cookie recipe. From the precise list of ingredients to expert baking tips, we’ll ensure you can replicate this timeless treat with ease. You’ll also discover fun variations, storage hacks, and answers to common questions about this iconic recipe.
Let’s dive into the magic behind these cookies and start your baking adventure!
Ingredients Needed

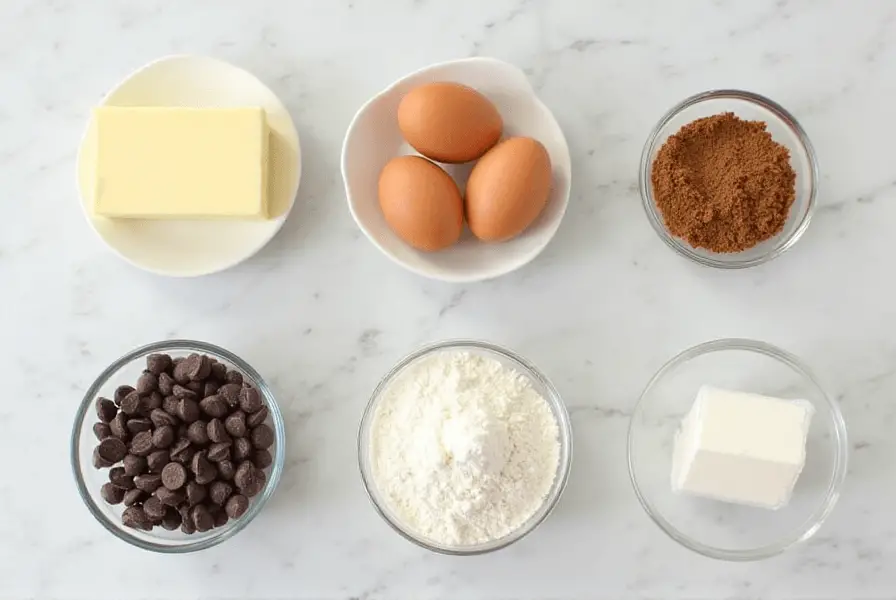
The magic of the Nestle Toll House Milk Chocolate Chip Cookie recipe lies in its simplicity and balance of flavors. To get started, gather the following ingredients. For best results, try to use fresh, high-quality components that enhance the taste and texture of your cookies.
Basic Ingredients
- All-Purpose Flour – 2 ¼ cups
- Flour provides the structure for your cookies. For a softer cookie, consider sifting the flour before measuring.
- Baking Soda – 1 teaspoon
- Helps the cookies rise and achieve their tender, chewy texture.
- Salt – 1 teaspoon
- Balances the sweetness and enhances the flavors of chocolate and butter.
- Butter – 1 cup (2 sticks), softened
- Choose unsalted butter to control the saltiness of your recipe. Let it soften at room temperature for even mixing.
- Granulated Sugar – ¾ cup
- Adds sweetness and contributes to the cookie’s crispy edges.
- Brown Sugar – ¾ cup, packed
- The molasses in brown sugar provides a chewy texture and depth of flavor.
- Vanilla Extract – 1 teaspoon
- Use pure vanilla extract for the best aroma and taste.
- Eggs – 2 large
- Eggs bind the dough and contribute to its richness. Room-temperature eggs mix more evenly.
- Nestle Toll House Milk Chocolate Chips – 2 cups (12-ounce package)
- The star of the recipe! These milk chocolate chips melt just enough to create gooey, chocolatey pockets.
- Chopped Nuts (optional) – 1 cup
- Walnuts or pecans add a delightful crunch, but feel free to leave them out if you prefer a nut-free cookie.
Ingredient Substitutions and Additions
While the classic recipe is perfection, you can make slight tweaks to suit your preferences or dietary needs:
- Butter Substitutes: Replace with coconut oil or a vegan butter alternative for a plant-based cookie.
- Flour Alternatives: Use a 1:1 gluten-free flour blend for gluten-free cookies.
- Sugar Alternatives: Try coconut sugar or a sugar substitute like erythritol to reduce the sugar content.
- Dairy-Free Chocolate Chips: Opt for a dairy-free brand like Enjoy Life to make the recipe suitable for vegans or those with dairy allergies.
Now that you have your ingredients ready, let’s move on to creating these cookies step by step.
Step-by-Step Guide

Baking the perfect Nestle Toll House Milk Chocolate Chip Cookies recipe requires following the steps with precision and care. From mixing the dough to baking the cookies, each phase plays a crucial role in achieving that signature chewy texture and delicious taste.
Preparing the Dough
- Preheat the Oven:
- Set your oven to 375°F (190°C). This temperature ensures the cookies bake evenly with a golden-brown finish.
- Mix the Dry Ingredients:
- In a medium-sized bowl, whisk together flour, baking soda, and salt. This step distributes the leavening agent and prevents clumping.
- Cream the Butter and Sugars:
- In a large mixing bowl, combine softened butter, granulated sugar, and brown sugar. Use an electric mixer on medium speed for 2–3 minutes until the mixture is light and fluffy. Proper creaming aerates the dough, ensuring tender cookies.
- Add the Vanilla and Eggs:
- Beat in the vanilla extract and eggs one at a time, mixing well after each addition. This step helps create a smooth and cohesive batter.
- Incorporate the Dry Ingredients:
- Gradually add the dry ingredients to the wet mixture. Reduce the mixer speed to low or use a spatula to avoid overmixing, which can make the cookies tough.
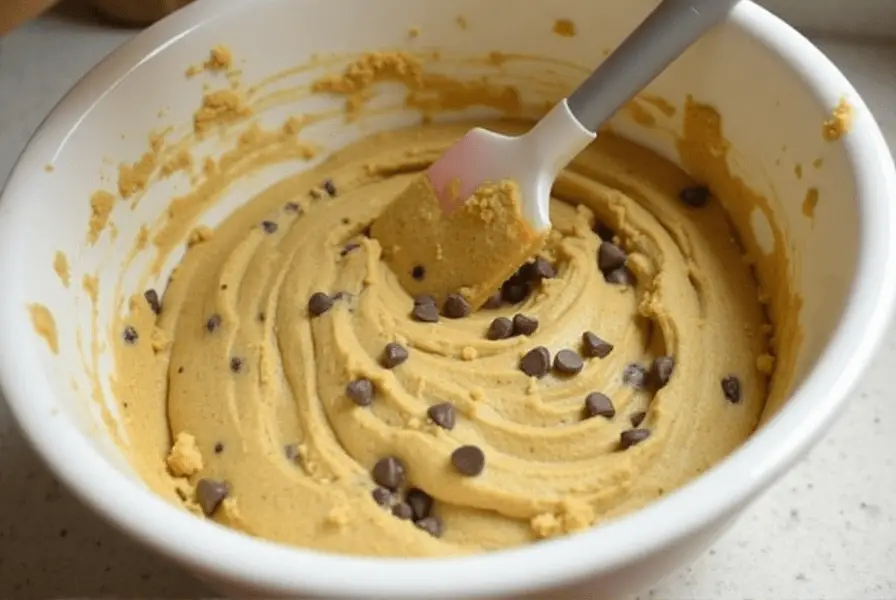
- Stir in the Chocolate Chips (and Nuts, if using):
- Fold in the Nestle Toll House Milk Chocolate Chips and nuts gently using a spatula. This prevents breaking the chips and ensures even distribution.
Shaping the Cookies
- Line Your Baking Sheet:
- Use parchment paper or a silicone baking mat to prevent sticking and ensure easy cleanup.
- Portion the Dough:
- Scoop out dough using a medium-sized cookie scoop or a tablespoon. Roll the dough into balls for even baking and place them 2 inches apart on the prepared sheet.
- Optional Chill Time:
- For thicker, chewier cookies, chill the shaped dough balls in the refrigerator for 30 minutes before baking. This prevents spreading.
Baking and Cooling
- Bake the Cookies:
- Place the tray in the preheated oven and bake for 9–11 minutes, or until the edges are lightly golden. The centers will still appear soft, but they’ll set as the cookies cool.
- Cool on the Baking Sheet:
- Allow the cookies to cool on the baking sheet for 2 minutes. This keeps them from breaking when transferred.
- Transfer to a Wire Rack:
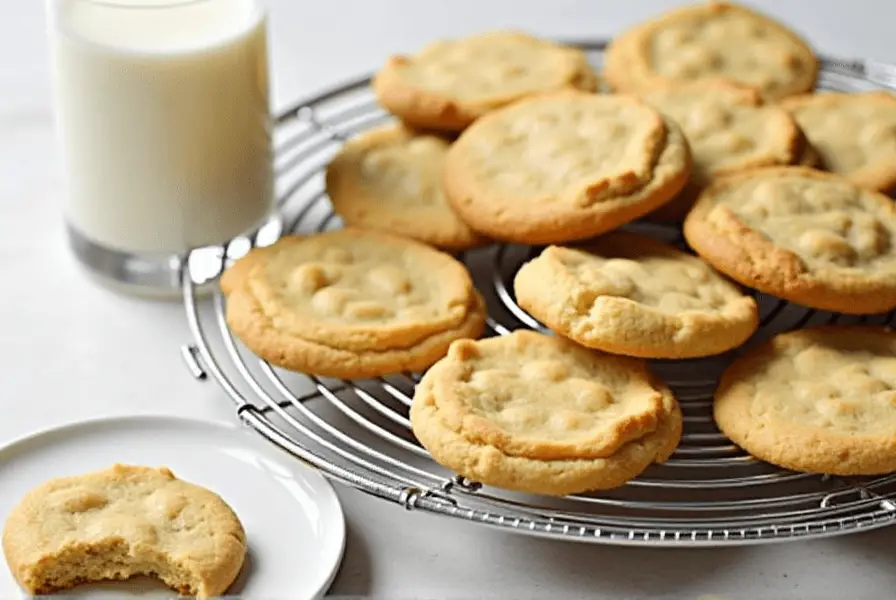
- Move the cookies to a wire rack to cool completely. This step ensures they maintain their chewy texture and don’t become soggy underneath.
With these steps completed, you’ll have a tray of warm, freshly baked cookies that are sure to delight anyone who takes a bite. Next, let’s explore some tips for making your cookies truly exceptional.
Tips for Perfect Cookies
Baking Nestle Toll House Milk Chocolate Chip Cookies is straightforward, but a few expert tips can take your cookies from good to exceptional. Here’s how to avoid common pitfalls and customize the recipe to your liking.
Common Mistakes to Avoid
- Overmixing the Dough:
- When combining the wet and dry ingredients, overmixing can overdevelop the gluten, resulting in tough cookies. Mix just until the flour is incorporated.
- Incorrect Butter Temperature:
- Butter that’s too soft or melted can cause the cookies to spread excessively. Aim for butter that’s soft but still holds its shape.
- Overbaking:
- The key to a chewy cookie is pulling them from the oven when the edges are golden, and the centers still look slightly underbaked. They’ll firm up as they cool.
- Measuring Ingredients Incorrectly:
- Use the scoop-and-level method for flour and sugar to avoid packing too much into the measuring cup, which can lead to dry cookies.
Adjustments for Dietary Needs
- Gluten-Free Cookies:
- Substitute all-purpose flour with a gluten-free 1:1 baking flour. Ensure your chocolate chips are certified gluten-free.
- Dairy-Free Cookies:
- Use a vegan butter substitute and dairy-free chocolate chips. Ensure other ingredients, like sugar, are free from hidden dairy derivatives.
- Egg-Free Version:
- Replace eggs with a flax egg (1 tablespoon flaxseed meal + 2.5 tablespoons water per egg) or applesauce (¼ cup per egg).
Tools That Make a Difference
- Baking Sheets:
- Choose light-colored, heavy-duty baking sheets to prevent the bottoms of the cookies from browning too quickly.
- Parchment Paper or Silicone Mats:
- Both options provide a non-stick surface and encourage even baking.
- Cookie Scoop:
- For uniform cookies, a cookie scoop ensures each ball of dough is the same size, promoting even baking.
- Wire Cooling Rack:
- Allows air to circulate under the cookies as they cool, preventing sogginess.
Secrets to Enhanced Flavor
- Chilling the Dough:
- Chilling the dough for 24–48 hours before baking enhances the flavors as the ingredients meld together.
- Browning Butter:
- For a nutty, caramel-like flavor, brown the butter on the stovetop before mixing it with the sugars. Let it cool slightly before using.
- Mixing Chocolates:
- Use a combination of milk chocolate, dark chocolate, and semi-sweet chips for complex, layered flavors in every bite.
- Adding a Sprinkle of Sea Salt:
- A light dusting of flaky sea salt on freshly baked cookies enhances the sweetness and brings out the chocolate flavor.
By following these tips, you’ll elevate your Nestle Toll House cookies into a show-stopping treat that everyone will rave about. Next, let’s explore some fun variations to keep things interesting.
Variations to Try
While the classic Nestle Toll House Milk Chocolate Chip Cookie recipe is beloved for a reason, experimenting with variations can bring new flavors and textures to the table. Whether you’re looking to add a twist to the original or cater to specific dietary needs, these ideas will inspire your next baking session.
Flavor Additions
- Nuts:
- Add a crunch with chopped walnuts, pecans, or even almonds. Lightly toasting the nuts before mixing them in enhances their flavor.
- Candies:
- Replace some or all of the chocolate chips with M&Ms, peanut butter cups, or caramel bits for a fun, colorful twist.
- Spices:
- A pinch of cinnamon or nutmeg can add warmth and depth, especially during the holidays.
- Dried Fruits:
- Mix in dried cranberries, raisins, or chopped apricots for a sweet and tangy variation.
Chocolate Substitutions
- Dark Chocolate Chips:
- Swap milk chocolate chips for dark or bittersweet chocolate to create a richer, less sweet cookie.
- White Chocolate Chips:
- Combine milk and white chocolate chips for a creamy and indulgent experience.
- Chunks and Bars:
- Chop your favorite chocolate bar into irregular chunks for a rustic, bakery-style look.
Texture Adjustments
- Thicker Cookies:
- Chill the dough for an hour or more before baking to reduce spreading and create thicker, chewier cookies.
- Crispy Edges:
- Increase the baking time slightly or lower the oven temperature to 350°F (175°C) for evenly crispy cookies.
- Chewy Centers:
- Add an extra tablespoon of brown sugar, as its moisture content helps achieve a chewy texture.
Dietary Variations
- Gluten-Free:
- Use a high-quality gluten-free flour blend, such as Bob’s Red Mill or King Arthur, for cookies that rival the original.
- Vegan Cookies:
- Substitute butter with vegan alternatives like Earth Balance, and eggs with flax eggs or applesauce. Use dairy-free chocolate chips.
- Sugar-Free:
- Replace sugars with erythritol or a blend like Swerve. Ensure to adjust quantities as sugar substitutes can vary in sweetness.
Seasonal and Festive Twists
- Holiday Spice Cookies:
- Add ginger, allspice, or a pinch of cloves to create cookies reminiscent of gingerbread. Top with festive sprinkles.
- Pumpkin Chocolate Chip Cookies:
- Mix in ½ cup of pumpkin puree and a dash of pumpkin spice for a fall-inspired treat.
- Mint Chocolate Chip Cookies:
- Fold in crushed peppermint candies or mint chocolate chips for a refreshing holiday cookie.
Fun with Shapes and Sizes
- Cookie Bars:
- Spread the dough into a greased or lined 9×13-inch pan and bake for 25–30 minutes. Cut into squares or bars after cooling.
- Mini Cookies:
- Use a small cookie scoop to create bite-sized treats, perfect for snacking or serving at parties.
- Giant Cookies:
- Form larger dough balls and bake slightly longer for jumbo-sized cookies. These make a great gift or centerpiece dessert.
With so many variations to choose from, you can keep the Nestle Toll House Milk Chocolate Chip Cookie recipe fresh and exciting for every occasion. Now, let’s discuss how to store and serve your cookies for maximum enjoyment.
Storing and Serving

To fully enjoy your freshly baked Nestle Toll House Milk Chocolate Chip Cookies, proper storage and creative serving ideas are essential. Here’s how to maintain their freshness and make every bite a treat.
Best Ways to Store Cookies
- Room Temperature Storage:
- Once the cookies have cooled completely, store them in an airtight container at room temperature for up to 1 week. Add a slice of bread to the container to keep them soft and chewy.
- Refrigeration:
- If you live in a warm or humid climate, refrigerate the cookies in an airtight container for up to 2 weeks. Bring them to room temperature before serving for the best texture.
- Freezing Baked Cookies:
- Place cooled cookies in a single layer on a baking sheet and freeze until firm. Then, transfer them to a zip-top freezer bag or container. Cookies can be frozen for up to 3 months. Defrost at room temperature or heat them in a 350°F (175°C) oven for 5 minutes to refresh them.
- Freezing Cookie Dough:
- Portion the dough into balls and freeze them on a tray until solid. Store the frozen dough balls in a freezer bag for up to 3 months. Bake directly from frozen, adding 1–2 minutes to the baking time.
Tips for Keeping Cookies Fresh
- Separate Layers:
- Place a sheet of parchment paper between cookie layers to prevent sticking and crumbling.
- Avoid Moisture Exposure:
- Keep cookies away from humid conditions, as this can make them soggy or stale.
- Revive Stale Cookies:
- If your cookies lose their softness, place them in a container with a damp paper towel for a few hours. Avoid direct contact with the cookies.
Creative Serving Ideas
- Classic Pairings:
- Serve cookies with a tall glass of cold milk, hot coffee, or a mug of hot chocolate for a timeless combination.
- Ice Cream Sandwiches:
- Spread softened ice cream between two cookies and freeze until firm. Experiment with flavors like vanilla, chocolate, or mint chip for variety.
- Dessert Board:
- Create a cookie dessert board with an assortment of Toll House cookies, brownies, fruit, and dipping sauces like caramel or chocolate.
- Crumbled Toppings:
- Crumble cookies over yogurt, ice cream, or pudding to add a delightful crunch.
Gifting and Sharing
- Cookie Jars or Boxes:
- Pack cookies in a decorative jar or gift box lined with parchment paper. Add a ribbon and personalized note for a thoughtful gift.
- Holiday Treat Bags:
- Place cookies in themed cellophane bags for holiday parties or family gatherings.
- Bake Sales and Events:
- Wrap cookies individually in clear plastic wrap for a professional look. Attach an ingredient label for transparency.
Storing and serving your cookies properly ensures you enjoy every crumb, whether fresh from the oven or days later. Now, let’s wrap up the article with some frequently asked questions and a conclusion.
FAQ
Here are answers to some of the most frequently asked questions about the Nestle Toll House Milk Chocolate Chip Cookie recipe. These tips will help address common concerns and ensure your cookies turn out perfect every time.
Why are my cookies spreading too much?
Cookies often spread too much due to overly soft or melted butter. Ensure your butter is softened but still holds its shape. Chilling the dough before baking can also help prevent excessive spreading by firming up the fats.
Can I use salted butter instead of unsalted butter?
Yes, but if you’re using salted butter, reduce the added salt in the recipe by half to balance the flavor. Keep in mind that unsalted butter gives you better control over the saltiness of your cookies.
How can I make my cookies chewier?
To achieve chewier cookies:
- Use more brown sugar than granulated sugar, as brown sugar adds moisture.
- Slightly underbake the cookies, pulling them from the oven when the centers look soft.
- Chill the dough for at least 30 minutes before baking to reduce spreading and create a chewier texture.
Can I freeze cookie dough and bake it later?
Absolutely! Portion the dough into balls and freeze them on a tray until solid. Once frozen, store them in a zip-top freezer bag for up to 3 months. You can bake them directly from frozen—just add 1–2 minutes to the baking time.
How do I know when the cookies are done baking?
The cookies are ready when the edges are lightly golden, and the centers still look slightly underbaked. This ensures a soft, chewy texture. Let the cookies cool on the baking sheet for 2 minutes to firm up before transferring to a wire rack.
Can I make this recipe without eggs?
Yes! Replace each egg with a flax egg (1 tablespoon ground flaxseed mixed with 2.5 tablespoons water) or ¼ cup unsweetened applesauce. These substitutes work well to bind the dough and maintain the texture.
With these aswers, even first-time bakers can feel confident about making the perfect Nestle Toll House Milk Chocolate Chip Cookies. Let’s wrap up the article with a conclusion.
Explore More on Nestle Chocolate Chip Cookies
For additional inspiration, recipes, and details about Nestle Chocolate Chip Cookies, visit the following resource:
Corner Recipe: Nestle Chocolate Chip Cookie.
This article offers another perspective on crafting delicious chocolate chip cookies, with unique tips and methods to complement what you’ve learned here.
Conclusion
Nestle Toll House Milk Chocolate Chip Cookies are a timeless classic that brings joy to kitchens around the world. From their humble beginnings in the 1930s to their status as an iconic dessert today, these cookies have remained a favorite for their irresistible combination of chewy centers, crisp edges, and gooey chocolate goodness.
By following the step-by-step guide, using quality ingredients, and incorporating expert tips, you can recreate this beloved recipe with ease. Whether you stick to the traditional version or explore fun variations like adding nuts, candies, or adapting for dietary needs, the possibilities are endless. Plus, with proper storage and creative serving ideas, these cookies can be enjoyed fresh or shared as gifts for any occasion.
So grab your mixing bowl, preheat your oven, and treat yourself (and your loved ones) to the warm, comforting aroma of freshly baked cookies. There’s nothing quite like the joy of biting into a homemade Nestle Toll House Milk Chocolate Chip Cookie. Happy baking!
If you need further edits, additions, or specific tweaks to the article, feel free to ask! 😊

