Starbucks Cake Pop Recipe
Introduction
Cake pops have become a beloved treat for dessert lovers everywhere, combining the decadence of cake with the convenience of a bite-sized dessert. Among the many options available, Starbucks cake pops stand out for their perfectly round shape, smooth coating, and delightful flavors. These tiny treats are a hit for parties, special occasions, or as a quick indulgence alongside your favorite coffee.
But what if you could recreate these delicious cake pops at home? With the right ingredients, tools, and techniques, you can make cake pops that rival Starbucks in taste and appearance, all while adding your personal touch. Whether you’re a seasoned baker or a beginner, this guide will walk you through every step of the process, from baking the cake to dipping and decorating the final product.
Understanding the Basics
What Makes a Starbucks cake pop recipe?
At its core, a cake pop is made by combining crumbled cake with frosting to form a dough-like mixture. This mixture is then shaped into balls, placed on sticks, and coated with a smooth chocolate or candy shell. The result is a dessert that’s not only delicious but also visually appealing.
Ingredients Overview
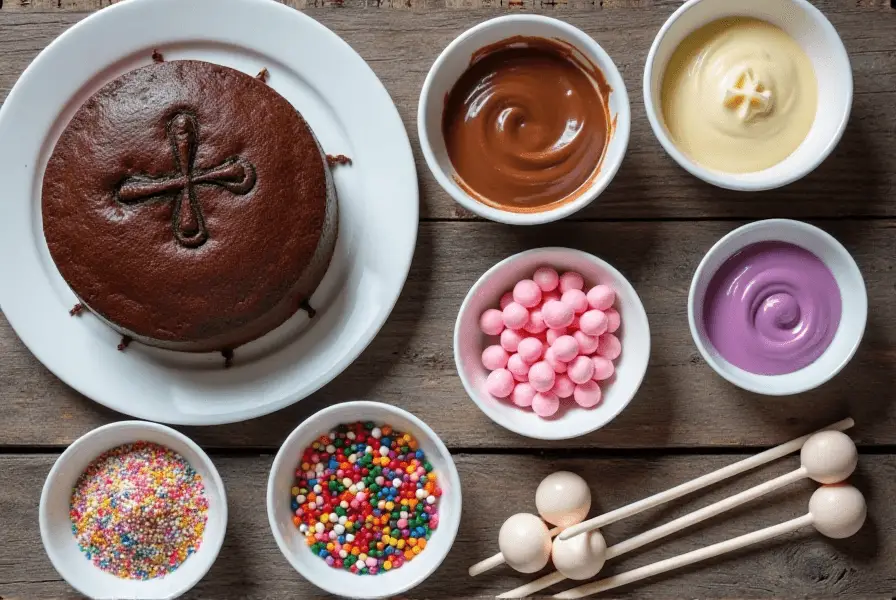
The beauty of cake pops lies in their versatility. You can use any cake flavor you like—vanilla, chocolate, red velvet, or even a pre-made boxed cake mix. Paired with complementary frosting and decorated with creative toppings, the possibilities are endless. The smooth coating can be made from melted chocolate, candy melts, or even white chocolate dyed in various colors.
Understanding the Basics (Continued)
Key Ingredients

The key to nailing the Starbucks cake pop recipe is choosing high-quality ingredients and pairing them wisely. Here’s what you’ll need:
- Cake Base:
- Options: Vanilla, chocolate, or red velvet are classic choices. You can use a homemade cake or a boxed mix for convenience.
- Tip: Ensure the cake is moist but not overly dense for easy crumbling.
- Frosting:
- Choices: Buttercream, cream cheese frosting, or even store-bought frosting work well.
- Tip: Avoid overly sweet frosting if your cake is already rich.
- Coating:
- Chocolate or Candy Melts: Choose a coating that melts smoothly and hardens quickly. White, milk, and dark chocolates are all great options.
- Tip: Add a teaspoon of vegetable shortening or coconut oil to the melted coating for a smoother finish.
- Decorations:
- Sprinkles, edible glitter, or crushed nuts can add a festive or gourmet touch.
- Starbucks Inspiration: Use pastel sprinkles or drizzle contrasting chocolate for a polished look.
Essential Tools
Using the right tools simplifies the process and ensures professional-looking results. Here’s a checklist:
- Mixing Bowls: For combining cake crumbs and frosting.
- Cake Pop Sticks: These wooden or plastic sticks are sturdy enough to hold the pops.
- Scoops or Spoons: Use a small cookie scoop for evenly sized pops.
- Styrofoam Block or Cake Pop Stand: Essential for holding pops upright while the coating sets.
- Parchment Paper: Keeps your workspace clean and prevents sticking during shaping.
- Double Boiler or Microwave-Safe Bowl: For melting chocolate or candy melts.
Preparing the Cake Base
Step-by-Step Guide for Making the Cake
- Choose Your Cake Recipe:
- If using a boxed mix, follow the package instructions for baking a basic cake.
- For a homemade option, use a simple vanilla or chocolate cake recipe. Ensure it’s cooled completely before use.
- Bake and Cool:
- Bake the cake in a standard pan (9×13 inches works well). Allow it to cool completely on a wire rack before handling.
- Tips for Moistness:
- Use ingredients at room temperature for a smoother batter.
- Do not overbake; a moist cake crumbles more easily and binds well with frosting.
Crumbling and Mixing
Crumbling the Cake
- Break the cake into large chunks with your hands or a fork.
- Rub the chunks between your fingers to create fine crumbs. The goal is a uniform texture without large lumps.
Mixing with Frosting
- Start with a small amount of frosting (about 1/4 cup) and add it to the cake crumbs.
- Mix thoroughly using a spoon, spatula, or your hands.
- Check the consistency: The mixture should be moist enough to hold its shape when rolled into a ball but not sticky.
Shaping the Starbucks cake pop recipe
Creating Perfect Balls
- Portion the Mixture:
- Use a small cookie scoop or tablespoon to measure equal amounts of the cake and frosting mixture. This ensures uniformity in size and makes the pops more visually appealing.
- Roll into Balls:
- Roll each portion between your palms to form smooth, round balls. Avoid pressing too hard, as this can make the texture too dense.
- Place the rolled balls on a parchment-lined baking sheet.
- Chill the Balls:
- Transfer the baking sheet to the refrigerator for at least 1–2 hours or freeze them for 15–20 minutes. This step firms up the balls, making them easier to handle during coating.
Using Molds for Uniformity
If you’re aiming for professional-level perfection:
- Invest in a cake pop mold or shaper. These molds help achieve consistent sizes and shapes, especially for themed pops like hearts or stars.
- Simply press the mixture into the mold and remove gently.
Inserting the Sticks
Preparing the Sticks
- Dip the Tips:
- Melt a small amount of your coating chocolate or candy melts.
- Dip about half an inch of each cake pop stick into the melted coating. This acts as a “glue” to secure the stick to the cake pop.
- Insert into Balls:
- Insert the coated tip of the stick about halfway into each chilled cake ball.
- Be gentle to avoid cracking the cake pop.
Securing the Sticks
- Allow the chocolate around the base of the stick to set slightly before proceeding.
- For extra security, let the pops rest in the refrigerator for another 10–15 minutes after inserting the sticks.
Dipping and Coating

Choosing the Right Coating
- Types of Coatings:
- Candy melts: Available in various colors and designed specifically for dipping.
- Chocolate: Use good-quality baking chocolate for a glossy finish.
- Preparing the Coating:
- Melt the chocolate or candy melts in a microwave or double boiler. Stir until smooth.
- Add a teaspoon of vegetable shortening or coconut oil for a thinner consistency if needed.
Dipping the Pops
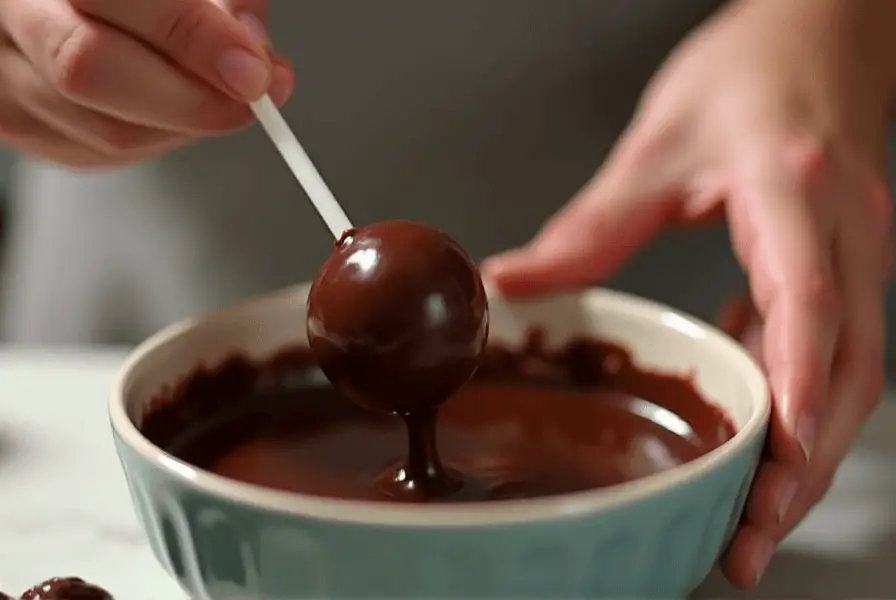
- Hold the cake pop by the stick and gently dip it into the melted coating. Ensure the pop is completely submerged for even coverage.
- Tap off the excess coating by lightly tapping the stick against the edge of the bowl while rotating the pop. This prevents pooling at the base.
Ensuring Smooth Finishes
- Work quickly, as the coating hardens fast.
- If imperfections appear, use the back of a spoon to smooth the coating before it sets.
Decorating Ideas
Adding Toppings
- Sprinkles:
- Add colorful or themed sprinkles immediately after dipping while the coating is still wet.
- Drizzles:
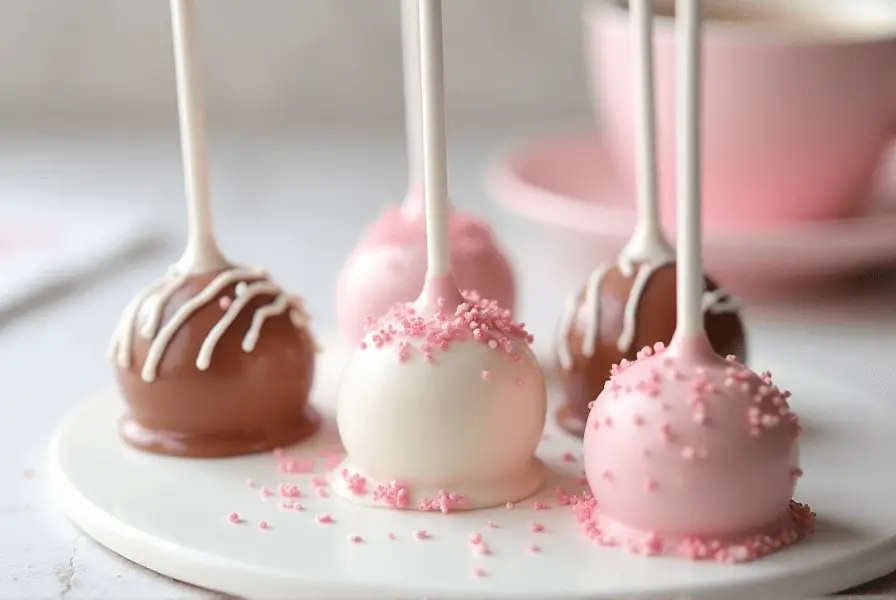
- Melt a contrasting color of chocolate or candy melts and drizzle it over the coated pops for a professional look.
Starbucks Inspiration
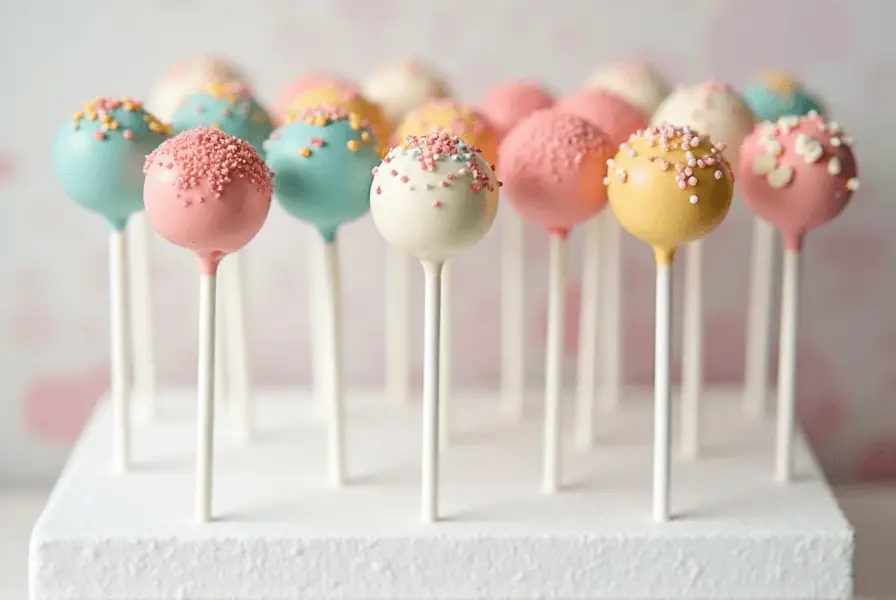
- Use pastel or white candy melts with minimalistic decorations, like fine lines or small sprinkles, to mimic Starbucks’ iconic style.
- For a seasonal twist, incorporate holiday-themed toppings like red and green sprinkles for Christmas or heart shapes for Valentine’s Day.
Heading 2: Setting and Storing
Setting the Cake Pops
- Using a Styrofoam Block or Cake Pop Stand:
- Place the dipped cake pops upright into a Styrofoam block or specialized cake pop stand. This prevents the coating from smudging and allows it to set evenly.
- If you don’t have a Styrofoam block, a sturdy cardboard box with holes works well.
- Cooling Time:
- Allow the coated cake pops to set at room temperature for 15–20 minutes. If the room is warm, place them in the refrigerator for quicker setting.
- Avoiding Humidity:
- Moisture can affect the coating, causing it to become sticky. Ensure the pops are stored in a cool, dry place.
Storing the Cake Pops
- Short-Term Storage:
- Store finished cake pops in an airtight container at room temperature for up to 3 days.
- If your environment is humid, refrigeration is recommended, but bring them to room temperature before serving for the best texture.
- Long-Term Storage:
- To freeze cake pops, wrap each one individually in plastic wrap and place them in a freezer-safe container.
- They can be frozen for up to 2 months. Thaw them in the refrigerator overnight before serving.
Variations and Customization
Flavored Cake Pops
- Classic Flavors:
- Chocolate cake with chocolate frosting and a dark chocolate coating.
- Vanilla cake with cream cheese frosting and white chocolate coating.
- Unique Twists:
- Red velvet cake with cream cheese frosting, coated in white chocolate.
- Lemon cake with lemon frosting and a yellow candy melt coating.
Vegan and Gluten-Free Alternatives
- Vegan Options:
- Use a plant-based cake recipe (e.g., almond milk and flaxseed eggs) and vegan chocolate or candy melts.
- Substitute dairy-based frosting with coconut cream frosting.
- Gluten-Free Choices:
- Bake with a gluten-free flour blend and ensure all other ingredients are gluten-free.
- Use gluten-free sprinkles and decorations to avoid cross-contamination.
Seasonal and Themed Pops
- Halloween: Pumpkin-shaped pops with orange candy melt coating.
- Christmas: Pops shaped like ornaments or snowmen with festive colors.
- Birthday Parties: Use themed colors and add personalized messages with edible markers.
Common Mistakes to Avoid
- Overloading with Frosting:
- Too much frosting can make the mixture too soft, causing the balls to fall apart. Add frosting gradually and test consistency.
- Skipping the Chilling Step:
- If the balls aren’t firm, they may fall off the sticks during dipping. Always chill thoroughly before coating.
- Overheating the Coating:
- Overheated chocolate or candy melts can become thick and unusable. Melt slowly in short intervals and stir frequently.
- Cracking Coating:
- Coating cracks when the cake balls are too cold, and the warm coating hardens too quickly. Let the balls sit for a few minutes after chilling to avoid extreme temperature differences.
- Uneven Coverage:
- Ensure the coating is smooth and runny for easy dipping. Tap off excess gently for a uniform layer.
Serving and Presentation

Creative Serving Ideas
- Elegant Displays:
- Arrange the cake pops in a Styrofoam block covered with decorative paper or fabric for a polished display.
- Use clear jars or vases filled with colorful candies or beans to hold the sticks upright.
- Party Themes:
- Match the colors and decorations of the cake pops to the theme of your event. For example:
- Baby Showers: Use pastel-colored coatings and small bow decorations.
- Birthdays: Add edible glitter or age-specific toppers.
- Match the colors and decorations of the cake pops to the theme of your event. For example:
- Individual Wrapping:
- Wrap each cake pop in clear cellophane and tie it with a ribbon for a classy, portable dessert option.
- Attach a personalized tag with messages or names for a thoughtful touch.
- Interactive Serving:
- Set up a DIY station at parties with undipped cake pops, melted coatings, and toppings so guests can customize their own.
FAQ
How Do I Prevent Cracks in the Coating?
Cracks typically occur due to temperature differences between the cake ball and the coating. To prevent this:
- Allow the cake balls to sit at room temperature for a few minutes after chilling before dipping.
- Ensure the melted coating is not too hot.
Can I Freeze Cake Pops?
Yes, cake pops can be frozen for long-term storage. Wrap each pop individually in plastic wrap and store in a freezer-safe container for up to 2 months. Thaw them in the refrigerator before serving to maintain their texture.
How Long Do Cake Pops Last?
Cake pops stay fresh for up to 3 days at room temperature in an airtight container. Refrigerated cake pops can last up to 1 week, while frozen ones can last up to 2 months.
What’s the Best Chocolate for Coating?
For a smooth and shiny finish, use high-quality baking chocolate or candy melts. Adding a small amount of vegetable shortening or coconut oil to the melted chocolate helps achieve the perfect dipping consistency.
Can I Make Cake Pops Without Sticks?
Absolutely! These are known as cake truffles. Simply shape the cake balls, dip them in coating, and place them directly on parchment paper to set.
How Can I Make Them Look Like Starbucks’?
To mimic Starbucks cake pops:
- Use pastel-colored candy melts and minimalistic decorations.
- Aim for a small, uniform size using a cookie scoop or mold.
- Opt for smooth chocolate finishes with simple sprinkles or drizzles.
Conclusion
Recreating Starbucks cake pops at home is a fun and rewarding project that allows you to enjoy a café-quality treat without stepping outside. From preparing the cake base to decorating the finished pops, each step is an opportunity to unleash your creativity and craft a dessert that’s both delicious and visually stunning.
Whether you stick to classic flavors or experiment with unique variations, homemade cake pops are guaranteed to be a hit at any gathering or as a personal indulgence. With this comprehensive guide, you’re well on your way to mastering the art of cake pops—so grab your ingredients and start rolling!
Here’s a customizable and printable version of the Starbucks-inspired cake pop recipe, including helpful tips to personalize it further:
Starbucks-Inspired Starbucks cake pop recipe
Ingredients:
The Cake Base:
- 1 box of vanilla, chocolate, or red velvet cake mix (or use a homemade cake recipe)
- 3 large eggs (or substitute as needed)
- 1/2 cup vegetable oil
- 1 cup water
The Frosting:
- 1/4 cup cream cheese frosting (store-bought or homemade)
- Adjust quantity based on the consistency of the mixture.
The Coating:
- 2 cups candy melts or high-quality baking chocolate (white, milk, or dark)
- 1 teaspoon vegetable shortening or coconut oil (optional for thinning)
Decoration:
- Assorted sprinkles, edible glitter, or chocolate drizzles
Equipment:
- Mixing bowls
- Parchment paper
- Cake pop sticks
- Cookie scoop
- Styrofoam block or cake pop stand
- Microwave-safe bowl or double boiler
- Spatula or spoon
Instructions:
1: Bake the Cake
- Preheat the oven to 350°F (175°C). Grease and flour a 9×13-inch baking pan.
- Prepare the cake batter according to the package or recipe instructions. Pour into the pan and bake for 25–30 minutes or until a toothpick inserted into the center comes out clean.
- Let the cake cool completely on a wire rack.
2: Prepare the Cake Pop Mixture
- Crumble the cake into fine crumbs in a large mixing bowl. Use your hands or a fork for even texture.
- Gradually mix in frosting, starting with 1/4 cup. Add just enough so the mixture holds together when pressed but isn’t sticky.
- Roll the mixture into 1-inch balls using a cookie scoop for uniform size. Place them on a parchment-lined baking sheet. Chill in the refrigerator for 1–2 hours or freeze for 15–20 minutes.
3: Attach the Sticks
- Melt a small amount of the coating. Dip the tip of each cake pop stick into the melted coating, then insert it halfway into a cake ball.
- Allow the chocolate to set in the refrigerator for 10–15 minutes to secure the sticks.
4: Dip and Decorate
- Melt the candy melts or chocolate in a microwave-safe bowl, stirring every 30 seconds until smooth. Add shortening or coconut oil if needed for a thinner consistency.
- Dip each cake pop into the coating, ensuring it’s fully covered. Gently tap off excess coating while rotating the stick for an even finish.
- Decorate immediately with sprinkles, drizzles, or other toppings before the coating sets.
5: Set and Serve
- Place the dipped cake pops upright in a Styrofoam block or stand to set completely.
- Once hardened, serve or wrap individually in cellophane for gifting.
Customization Tips:
- Flavor Variations:
- Substitute vanilla cake with lemon or strawberry for a fruity twist.
- Pair chocolate cake with peanut butter frosting for a Reese’s-inspired treat.
- Dietary Adjustments:
- For vegan pops: Use plant-based cake and frosting options, and dairy-free chocolate.
- For gluten-free pops: Swap regular flour with a gluten-free blend and ensure other ingredients are GF-certified.
- Seasonal Themes:
- Halloween: Use orange candy melts with spooky sprinkles.
- Christmas: Decorate with red and green candy melts and edible snowflakes.
- Valentine’s Day: Shape pops into hearts and use red or pink coatings.
- Kid-Friendly DIY:
- Set up a cake pop station with various decorations, allowing kids to design their own.
FAQ Recap:
- How long do cake pops last? Up to 3 days at room temperature, 1 week in the fridge, or 2 months in the freezer.
- Can I make them without sticks? Yes! Call them cake truffles instead.
- How to avoid cracks in coating? Balance the temperature between the cake balls and melted chocolate.
Conclusion
Making Starbucks-inspired cake pops at home is a fun and rewarding project that lets you enjoy this delightful treat anytime. By following the step-by-step guide, you can recreate the moist cake interior, smooth chocolate coating, and professional decorations that make these pops irresistible. Whether you stick to classic flavors or explore unique variations, your homemade cake pops will be perfect for parties, gifting, or simply enjoying as a sweet indulgence.
With a little practice and creativity, you’ll soon master the art of cake pops, adding your personal flair to every batch. So gather your ingredients, roll up your sleeves, and get ready to impress family and friends with your very own café-quality dessert!
Explore More Delicious Recipes
If you enjoyed this guide to making Starbucks cake pops, you might love trying out other irresistible recipes that will enhance your baking and cooking skills. Here are some fantastic options to explore:
Chocolate Pound Cake Recipe
Looking for another dessert to wow your guests? Check out this Chocolate Pound Cake Recipe. It’s rich, moist, and perfect for pairing with coffee or tea, much like your Starbucks-inspired cake pops!
Cottage Cheese Bread Recipe
Expand your baking repertoire with this unique Cottage Cheese Bread Recipe. It’s a delightful twist on classic bread, offering a soft, flavorful base for sandwiches or toasts.
Alice Springs Chicken Recipe
Need a savory complement to your cake pops? Try this Alice Springs Chicken Recipe. It’s a hearty, flavorful dish that’s sure to become a family favorite.
Cuisinart Bread Maker Recipes
For bread enthusiasts, don’t miss the Cuisinart Bread Maker Recipes. Whether you’re a beginner or a seasoned baker, these recipes are easy to follow and deliver bakery-quality results at home.
By exploring these recipes, you’ll not only master Starbucks cake pops but also discover a variety of sweet and savory treats to round out your culinary adventures. Dive into these guides to make every meal or dessert an unforgettable experience!

